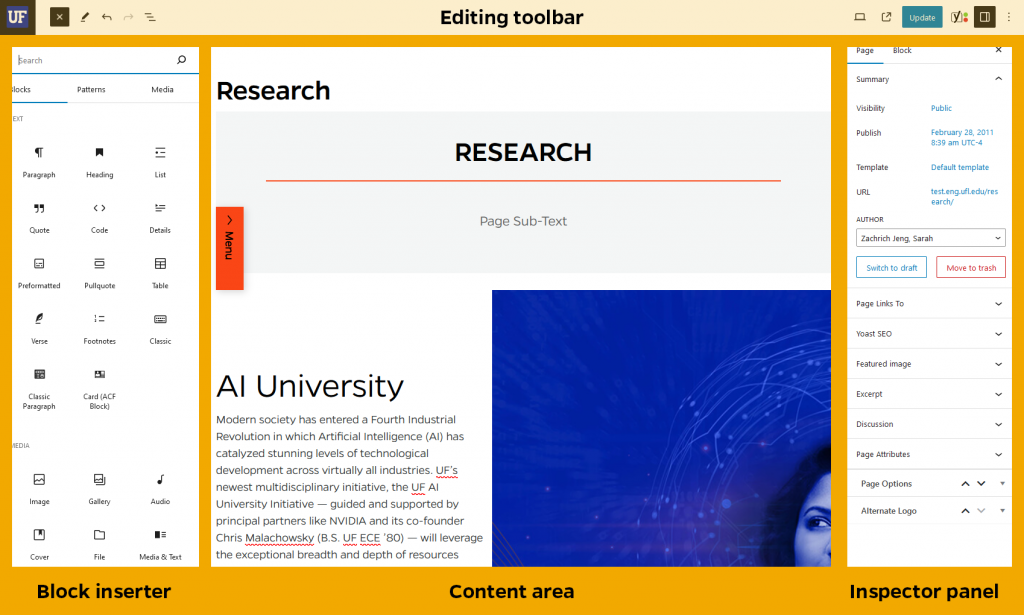
The WordPress Block Editor makes use of content blocks that can be easily added and arranged in a drag-and-drop interface. There are three main editing sections:
- The block inserter (where you choose content blocks to add to your page/post) and document overview (where you can select, edit, and move blocks)
- The content area, where you view and edit blocks you have placed on your page/post
- The inspector panel, where you edit page/post and block settings

Editing tools
The editing toolbar at the top lets you show and hide the left and right panels of the block editor, edit block settings and options, and preview your pages and posts. This is also where you will save a draft of your page/post or publish it, as well as update any changes.

Icons
These icons are specific to the block editor and present on most blocks:

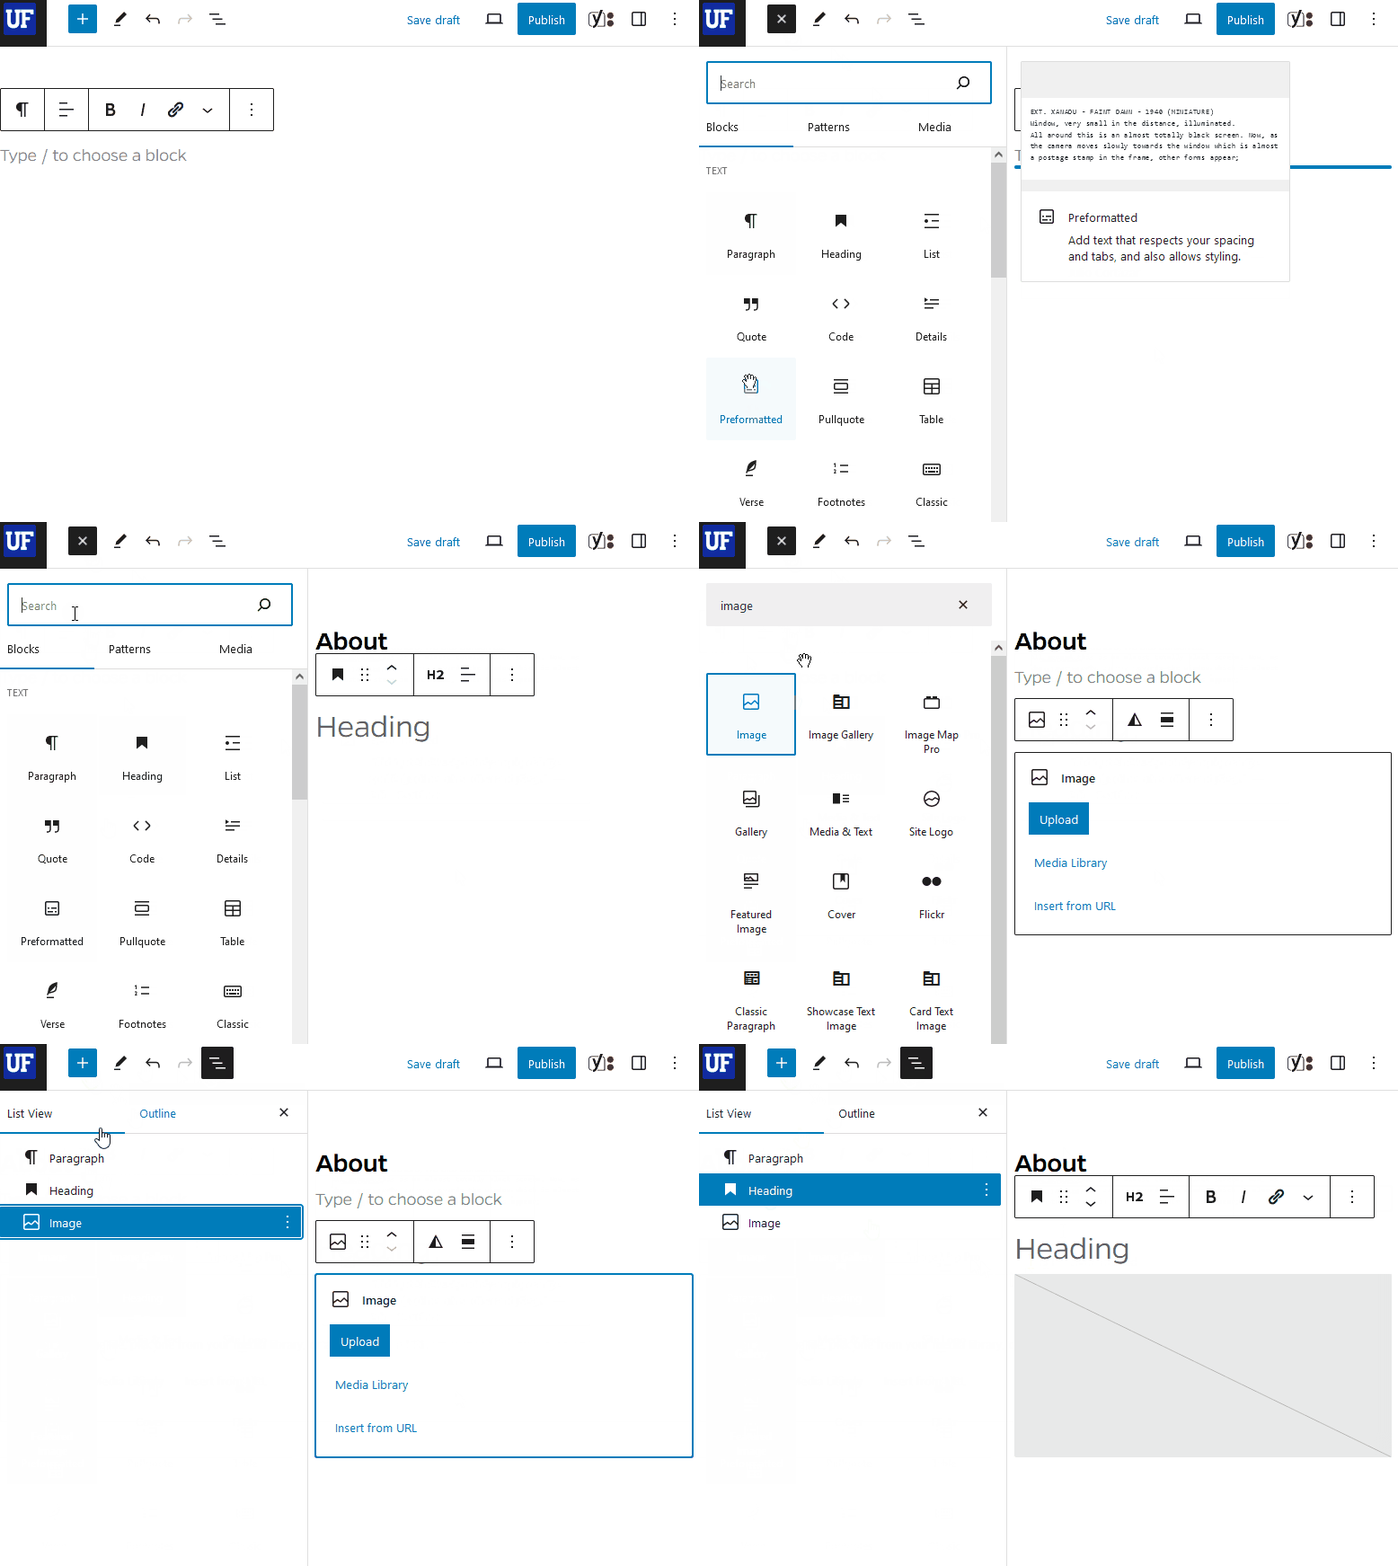
The multi-dotted icon, when selected, allows you to drag and drop blocks.

The move up and move down icons let you move blocks up or down within the content area.

The three-dotted icon opens options for the selected block.
Block inserter & document overview
To add a block, select the plus sign “Toggle block inserter” icon on the left side of the editing toolbar, or above or below existing blocks already in the page. Choose a content type from the list, or search or browse for a block type.
You can select blocks or nested “Innerblocks” by using the “Document Overview” icon.

Content area
WordPress and the Mercury theme provide a variety of content blocks you can use to build your pages. Rearrange blocks within the page by selecting a block and then dragging and dropping using the multi-dotted icon, or moving the block up or down using the arrows.

Many blocks (and especially the InnerBlocks nested inside them) will be easier to work with if you select them from within the Document Overview pane.
Inspector panel
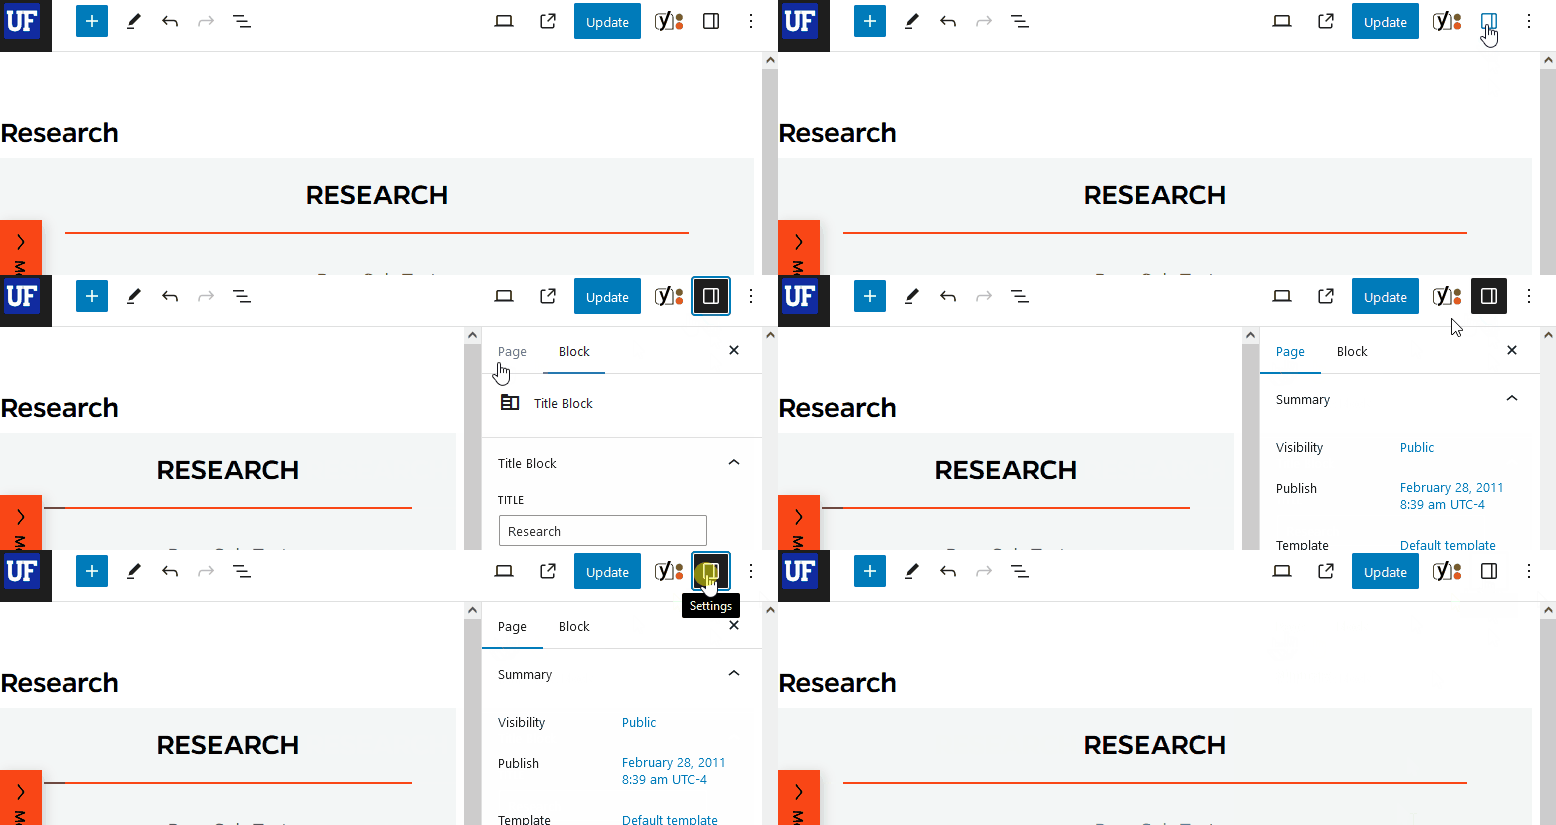
Toggle the inspector panel with the “Settings” icon and select between Page/Post or Block settings.
Block settings will show settings for the block that is currently selected in the content area.

Page/post settings
Summary
- Visibility: public, private, or password protected (this is different from restricting access to a page)
- Publish: immediately or schedule your page for publishing later
- Template: choose the page or post template
- URL: (aka Permalink) – change the automatically created address of your page here
Page links to
If you wish this page to automatically link to another page on your site or externally, select “A custom URL” under Page Links To and enter the URL.
Revisions
View and revert to a previous version of a page or post.
Categories (posts only)
Categories organize post content and make it easier for visitors to find. Categories can have a hierarchy, e.g. a “Departments” category with categories named for each department underneath.
Tags (posts only)
Tags label post content and make it easier for visitors to find. Tags do not have a hierarchy.
Featured image (only displays in certain post templates)
Upload a post featured image, or choose one from the Media Library. Featured images only display in posts that use the Full Width Image, Sidebar Left, and No Sidebar post templates.
Excerpt
Excerpts are optional, but they improve your site’s search engine optimization, and they are the summaries your site visitors see when your pages come up in search engine results.
Discussion (posts only)
Allow or disallow comments on an individual post.
Page attributes (pages only)
Choose a parent page and what order your page will occupy in page listings.
Options
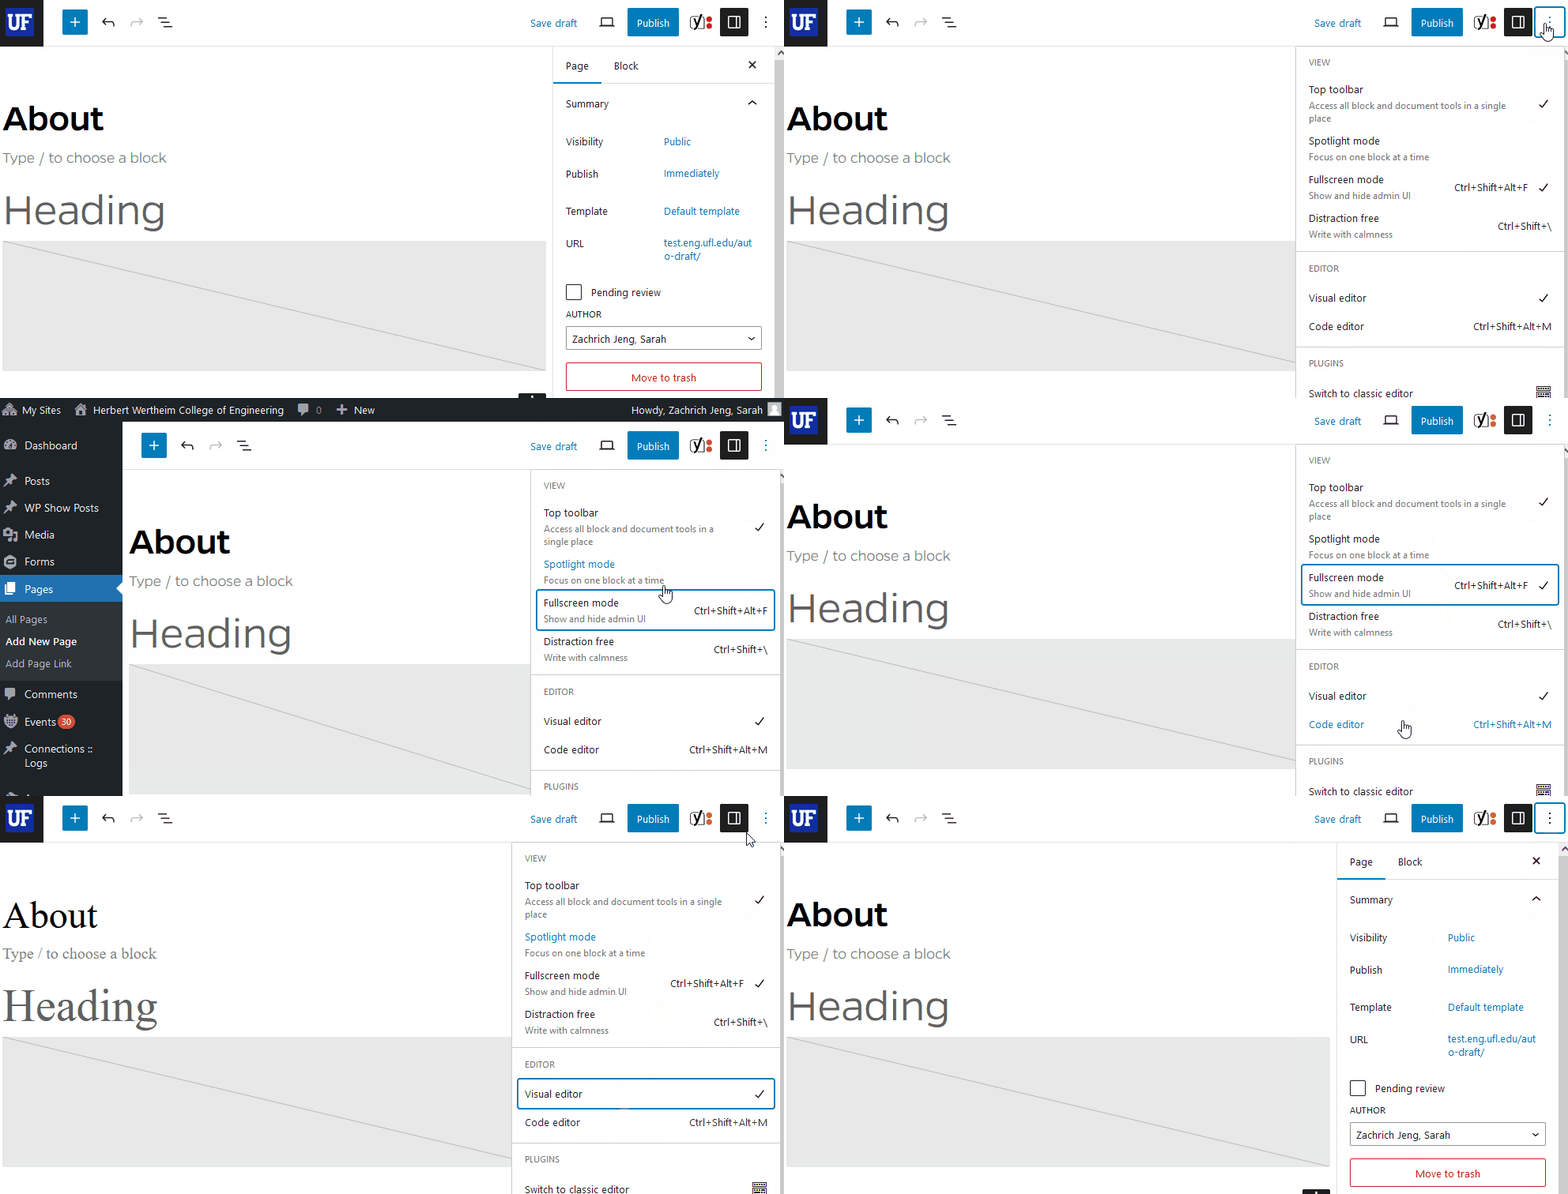
To view options, select the triple-dot icon at the top right of the editor. In Options you can select various editing modes, switch between code and visual editing, or switch to the Classic Editor (the “old WordPress” interface).
